The framing after the first week


We put protective sheeting on the garage floor

Made sure we were using FSC lumber! (This means your wood came from sustainably managed forests.)

Osbaldo Romero and his excellent crew arrived and really went to work for the first week of framing!!   Now the space is really starting to feel more like a house!  After the slab was poured, we were wandering around the downstairs floor saying “is this going to be too small??”  We were starting to wonder if in our zeal to build a “right sized” house, we were going to end up with something that felt too small when we were all done, but enclosing the space with the 10 ft walls paradoxically made the space feel larger…  it is funny how these things work.

The view into the wine cellar – it will be a tight space :-)

Ooops! Ouch! We spotted a couple bloody hand prints on the cross beams…

We’re excited to see how this continues in the next week.

Here it is! The final rough slab ready for sill plates and framing. Now things should really start taking off!

After all the back and forth with the insulation underneath the slab, it still wasn’t clear if the insulation was going to be thin enough around the edges for the rebar to be embedded deeply enough in the concrete.  It was fine in the center, but still a little thick at the edges.  But the engineer and the city both came out to inspect, and gave us the green light to pour.  The radiant barrier was put down (at right), and the final rough slab, and the steps in the wine cellar were poured.

That is almost it for concrete.  After this, it is only the final color concrete with the radiant flooring to put down, but that will come during the finishing steps much later – now the framing lumber is starting to arrive!

The final foam finish at the perfect height (the yellow color is from UV damage to the top layer of the otherwise green colored foam)

The next step was to put the insulation under the final portion of the slab to be poured.  The guys from Spray Foam Energy Solutions (SFES) came out to examine the site, and asked for landscaping fabric to be put down over the sand (on top of the vapor barrier that is in turn on top of all that compacted earth) so that when they sprayed the foam down, it wouldn’t blow the sand all over.  So Catherine spent a day neatening up the site and putting down fabric.

landscape fabric over the sand

When the guys from SFES came out, they initially sprayed the foam a bit thin.  Our general contractor called them up and said that we needed a full 2” of foam to get the R value we needed (reminding them that they had assured us they could keep to a tolerance of +/- 1/2” thick which we had thought was impressive when they said that given how much foam expands…), well… then after they had touched it up, the foam was too thick almost everywhere (see next pic)… and our topping slab was not going to be thick enough to satisfy the structural engineer.

The foam when it was too thick

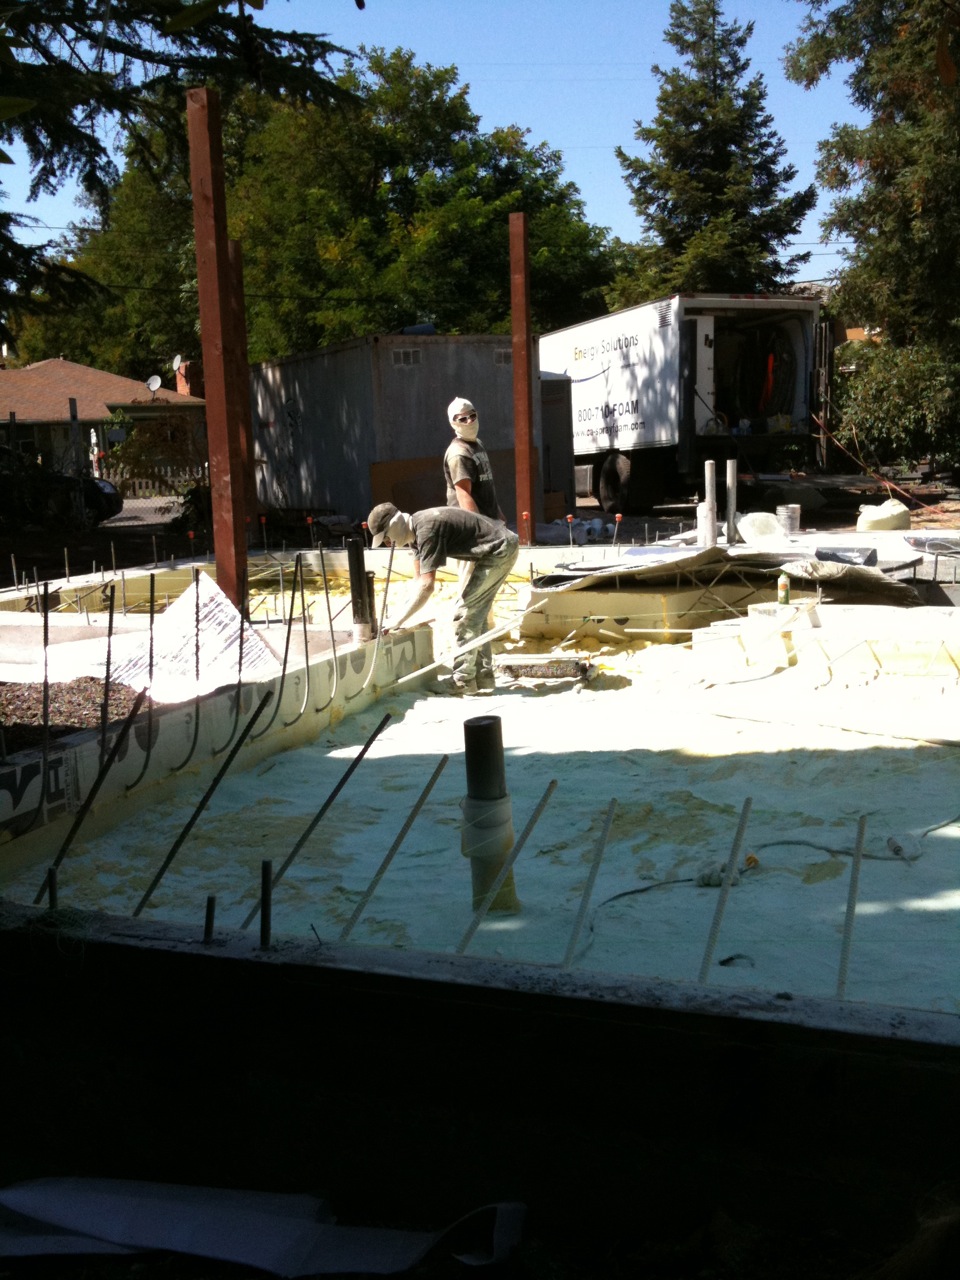
So the SFES guys were out there on a Saturday morning with their dust masks, and this really nasty looking powered steel brush that scraped the high spots off, and they leveled the foam until it was juuuust right… that was a dusty, hot, nasty job, and I felt bad for the poor guys out there doing that, but I got to hand it to them, they came in on a Saturday and worked until they made it right, and now we have a high compression foam insulation layer ready to have the radiant barrier laid down on top, and the final rough slab pour.

The foam being used is a soy-based closed cell expanding polyurethane foam made by Demilec called Heatlok Soya. So what makes a polyurethane foam green, and is that really possible??  Well, I went out and completely stole the following discussion and picture from a not disinterested party www.sprayfoam.com:

Wire brushing the foam

Most all SPFs (Spray Polyurethane Foams) on the market contain sucrose or soy based content. There are different aspects to consider when discussing the “green-ness” of SPF as it pertains to the product’s composition. SPF is produced from the reaction of two components referred to in the industry as the A side and B side. While the A side is a petroleum based isocyanate, the ingredients that make up the B side will vary from product to product consisting of a blowing agent, fire retardants, surfactants, catalysts and polyols.

Material components of polyurethane foam

So what does this mean?  That there are still lots of petroleum products in the sprayfoam even when the manufacturers have maxed out the amount of recycled material or agricultural based oils that they can use in the product (found in the polyol part of the material), but because it is pretty much the best insulation out there, and the closed cell SPFs are the only insulation that will stand the weight of concrete above it… it seems like a good choice to make, as the petroleum use will be well outweighed by the energy savings of not pouring our heat into the ground.

Pouring the garage floor

Yes, it has been a long time in between posts.  All the details that had to be worked out to do the partial perimeter pour paled in comparison to the back and forth to finalize the forms for this pour!

Under slab plumbing

The final dimensions of the wine cellar walls needed to be checked and rechecked and checked again, and then misunderstandings about where the insulation was going to be, where and how the plumbing needed to be supported, and how high up it needed to be wrapped, and which parts of the slab were to be insulated from which set us back a couple of weeks.  This was complicated by needing any modification to be approved by the structural engineers.  It was finally a set of hand sketches of cross-sectional details initially drawn by Catherine then duplicated by our General Contractor Paul Delgros that were approved and we now all agreed what it was that we were trying to build.

Concrete forms

The resulting forms for the wine cellar area were the most convoluted set of concrete forms imaginable.  The wide footings for the straw bale library were in place with the embedded posts for the shear. So now the final plumbing was complete, the new forms were in place (the right place!), the insulated slab and the non-insulated slab were isolated at the correct parting lines, the structural engineer signed off, the city signed off, and we were ready to do the second pour to complete the non-insulated slab sections.

Natalie leaves her mark

Five concrete trucks and a “cleanup” poured tons and tons and tons of concrete into our massive slab.  The trucks were late, so the concrete crew was working into the early evening to finish floating the garage floor, which was lucky for us.  On our way home, we stopped in at the house site and were able to put hand prints and our names into the still wet cement in one corner of the garage – now the house really is ours!  Nat put her age in, so we had to follow suit…. someday 40 will seem young.

Forms for the library

We used 25% fly ash in the concrete which is a waste byproduct of coal burning and is often used in concrete to improve it’s pouring characteristics and its strength.   25% fly ash means that 25% of the portland cement in the concrete was replaced with fly ash – what that means in terms of total percentage of the final concrete is fly ash, I’m not really sure, but since the portland cement is one of the largest CO2 producing components of the concrete, displacing much of it is good from that point of view. The Minnesota Center for Sustainable Building research estimates that if you use 25% fly ash instead of the standard 9%, you get an 11% reduction in CO2 emissions in your concrete manufacturing.  It also improves the flow, and up to a certain point, the strength of the concrete (the maximum strength improvement comes around 25-35%).

Finish Floating

One concern occasionally brought up about high fly ash use is heavy metals from the coal burning such as lead, arsenic and mercury are now encased in your concrete, but I guess I’d rather have them encased there than sitting out in a leach field somewhere getting washed into the ground water.  Another concern sometimes brought up is that by providing a market for a byproduct of coal burning, you are supporting the coal industry… I find that argument a bit hard to believe – surely the US dependance on coal has very little to do with whether anyone can find a use for its waste products.  So using this waste product that in turn offsets high carbon production manufacturing seems green enough for us!

We knew from the very beginning that we wanted to go water independent, and that we wanted to plant native California plants, and we wanted a vegetable garden, and we wanted to irrigate the fruit trees with a permitted grey water system which was filtered through a grey water wetlands, and have a stream, and somehow tie this yard in with both the old guest house we were leaving on the property and the new Zen modern architecture, and and and…  See blog posts “Planning for water independence”, “Fresh canvas”, “Grey is green” and “Rainwater cachement”.  Oh yeah, and have a beautiful yard that was inviting for guests to wander in, children to play in, had cool shady spots for those relaxed summer weekend lunches (for those future relaxed summer weekend lunches that one can have when you aren’t building a house!).

But where to start?  Many decisions were going to be driven by the details of the grey water system, and grey water systems that people put in are often pretty bad eyesores… big external piping and storage tanks full of pea gravel.  We wanted the water management to be a beautiful feature of the yard.   We had some sketches and ideas, and had been reading the bewildering California Plumbing Code on grey water systems, but we knew we’d need help.  Catherine was getting very worried that she wouldn’t be able to figure out how to get all the i’s dotted and the t’s crossed to make a permittable grey water system, and while we both had lots of ideas for the yard, no cohesive aesthetic was emerging that we felt would do justice to the house.

Extremely luckily for us, an old childhood friend of Catherine’s, Amy Cupples-Rubiano, is a LEED certified landscape architect extraordinaire with a lot of experience in California native landscaping from huge commercial projects that she had been working on.  We discussed her taking on this “little project” (the scale of our residential project is tiny compared to what she has been doing!), and she offered to do it through her consulting company Green Pad Designs.

We sat down together at the site and talked about all the things we wanted, and from her first sketch, we knew she would push us in some new directions and manage somehow to build all these desires into a cohesive whole – and we just got the final concept and are thrilled.